Whether you are shooting a TikTok or a corporate interview, the foundation of professional video is the 3 point lighting setup. It separates amateurs from pros, and it is surprisingly easy to master.
Source 1: The Key Light
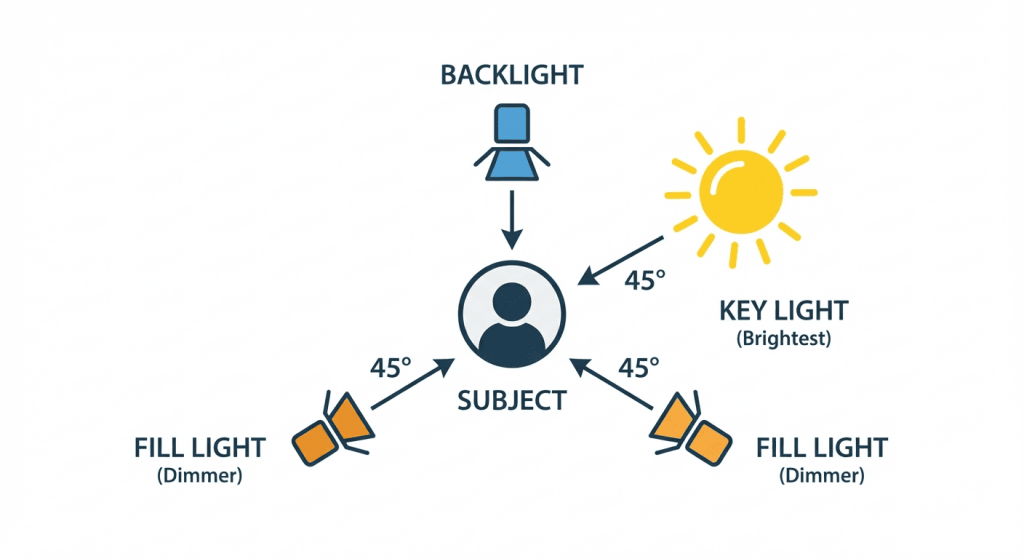
This is your primary light. Place your main Skytex softbox at a 45-degree angle to your face. It provides the main illumination and defines the shape of your subject.
Source 2: The Fill Light
The Key light will cast shadows on the opposite side of your nose. To soften these, use a second light (The Fill) on the opposite side. It should be roughly 50% as bright as the Key light. If you don’t have a dimmer, simply move the Fill light further back.
Source 3: The Backlight (Rim Light)
This is the secret sauce. Place a light behind the subject, pointing at their shoulders/hair. This creates a “halo” effect that separates the person from the background, giving the video a 3D look.
Conclusion
Don’t just blast light at your face. Build the scene. Try this setup once, and you will never go back to single-source lighting.