A common misconception among new creators is that using softboxes requires a dedicated studio or a massive living room. The reality is that some of the best-looking content on YouTube is recorded in bedrooms, dorms, and small home offices.
You do not need more space; you need better space management and the right small room lighting setup.
Space Management
In a tight space, floor area is premium real estate. Skytex softboxes are designed with an “Easy Fold” system, allowing them to be collapsed and stored under a bed or in a closet in under 60 seconds. Additionally, the stands are robust enough to double as utility hangers for cables or headphones when not in use, maximizing utility.
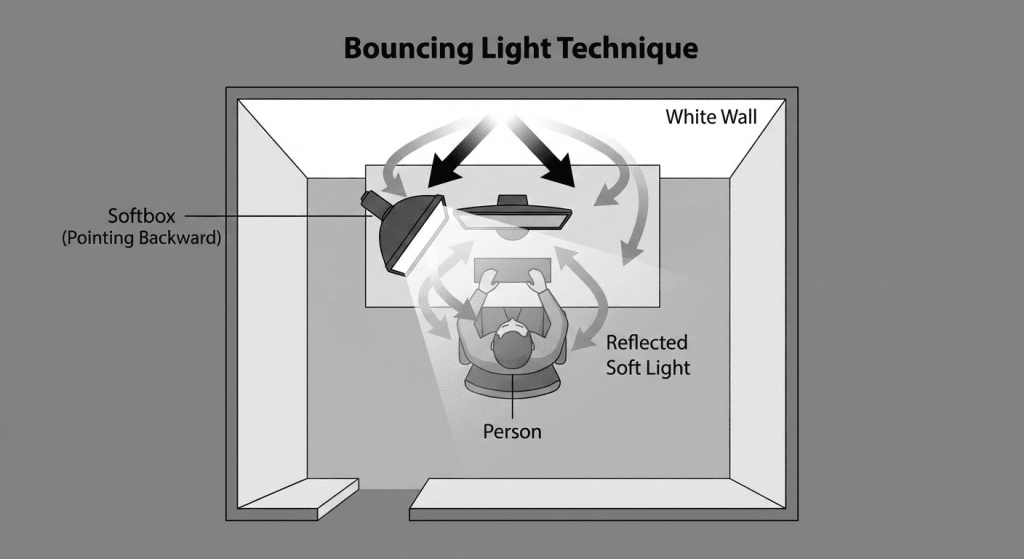
The “Bouncing” Technique
If you literally do not have the depth to place a softbox between you and the camera, use the “Bounce” method. Instead of pointing the light at your face, turn the Skytex softbox around and point it at a white wall or ceiling.
The wall becomes a giant reflector, turning your entire room into a soft light source. This provides a beautiful, wrapping light that requires zero floor space in front of your desk.
Desktop vs. Floor Stands
If floor legs are tripping you up, get the light off the floor. Skytex stands are adjustable. By lowering the stand to its minimum height and placing it on your desk behind your monitors, you achieve a compact softbox setup that illuminates your face without cluttering your walking path.
Conclusion
Your room is not too small; your gear just needs to be adaptable. With collapsible equipment and smart positioning, you can achieve a studio look in less than 2 square meters.